Global Settings
Warning
Setting up the Web GL ANGLE Backend
The chromium browser has a special blacklist that lists problematic video drivers for certain video cards. For this reason, not all video cards in the chromium browser will have WebGL2 support. Our statistics show that about 30% of users do not have WebGL2 support, but 70% of users have both WebGL1 and WebGL2 support.
For a better experience with Che Browser, your system should have both WebGL1 and WebGL2 support. But it happens that your video card is on the blacklist. In this case, you will experience problems if you use profiles that were built from computers that support both versions of WebGL. To prevent this from happening, we have introduced an option to force WebGL2 support. This is implemented by chromium’s built-in WebGL Angle Backend switch.
How to check whether WebGL1 and WebGL2 are supported?
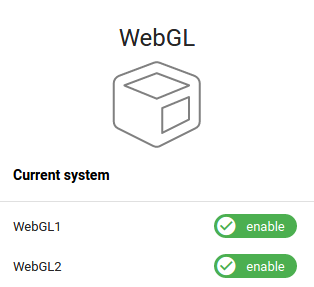
- Find the profile with WebGL1 and WebGL2 support (as in the screenshot below) among your list of profiles
- Launch this profile
- In the browser that opens, click the following link: https://v03.chebrowser.site/tools/test

After clicking on the link you should see that both versions of WebGL are supported. The screenshot below shows how it should look like.

If one version of WebGL is not supported, you must do the following
- Close the browser window in which you tested for WebGL support
- Go to Settings in the Che Browser app
- In the WebGL ANGLE backend drop-down list, select any of the items except default
- Click the SAVE button in the upper right corner
- Re-test for WebGL support as described above
If your results differ from the screenshot after retesting, you need to select a different value from the Web GL ANGLE backend list.
We recommend starting in this order: gl, d3d9, d3d11, gles, warp. On at least one of the listed WebGL Angle Backend, everything should start working as it should.
Chrome Extensions Folder
In version 0.3 we added the ability to automatically load chrome extensions into each profile. To avoid installing chrome extensions separately in each profile, you can once put the extensions you need in a special folder and specify the path to this folder in the Extensions folder path field.
When starting Che Browser will check whether the folder contains the extensions and will automatically add all found extensions to each profile.
It should be noted that the Extensions folder path should contain extracted versions of extensions. Each extension has its own folder and is located in it. If you put a packed extension, it will not be connected when you start the profile.
The algorithm for installing an unpacked extension in Che Browser
- open the standard Chrome browser
- install the extension you need. The installation is usually done through the Chrome Web Store.
- go to the list of installed extensions via the menu or at the address: chrome://extensions/
- switch the checkbox to Developer mode.
- find the extension you are interested in in the list of installed extensions
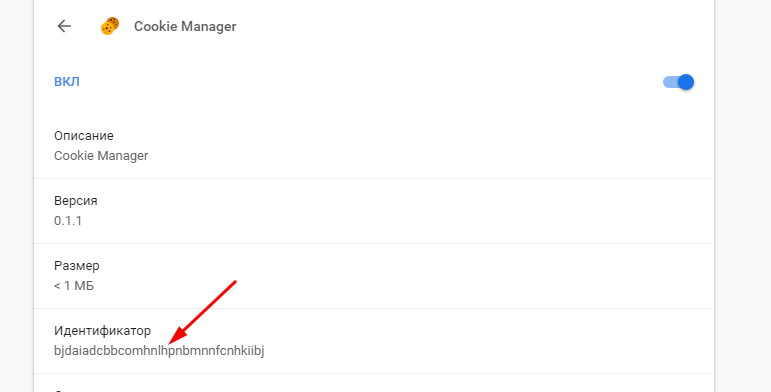
- find the Identifier field (something like: gnbnynpooeklmorcnmnodnsbn…)

- Navigate to the folder with the extensions in Windows Explorer (File Explorer). To go to this folder, click “My Computer” and paste the text below in the address bar
%LOCALAPPDATA%\Google\Chrome\User Data\Default\Extensions\
- find the unpacked extension folder with the name of the Identifier you are interested in
- copy this folder to the folder specified in the Extensions folder path field
As a result Extensions folder path should contain folders with unpacked extensions.
Warning